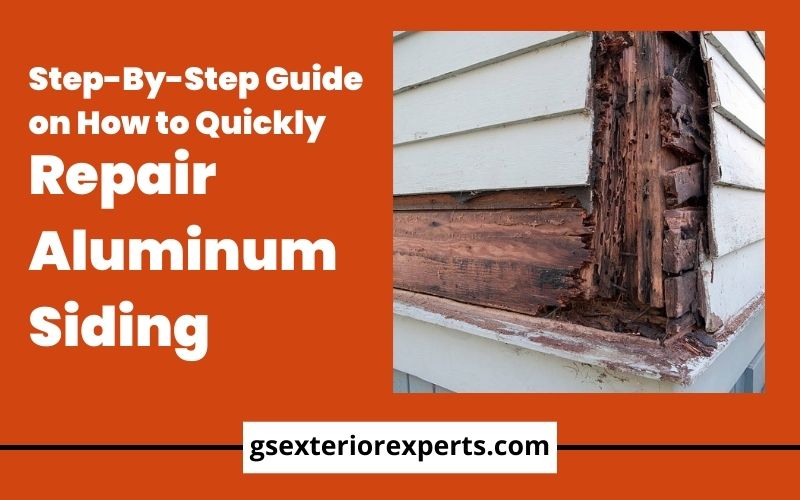
Aluminum siding is popular with many homeowners because it’s attractive and durable. However, over time, aluminum siding can become damaged by hail, wind, or other objects, and it’s not relatively easy to repair it yourself. So what’s next? GS Exterior Experts is the best remodeling contractor for your Colorado home. We’ll help you repair or replace your aluminum siding to look as good as new.
List of Materials You Need to Repair Your Aluminum Siding
First, you’ll need to gather the following materials:
- Scrap aluminum siding
- Latex gloves
- Aluminum repair epoxy
- Gutter sealant
- Waterproof repair tape
- Electric metal shears
- Metal snips
- Paintbrush
- Tape measure
Steps on How to Repair Aluminum Siding

Once you assemble the materials, follow these steps:
1. Remove the Damaged Area
You will only need basic cutting and measuring abilities for most fixes, which will take less than an hour. Using a crowbar, remove the damaged siding.
2. Fix the Edges With Waterproof Repair Tape
Cover the spaces to provide additional protection against moisture or insects. This material adheres to surfaces like aluminum and other metals to create a watertight seal while allowing temperature-related expansion and contraction. It also helps to hold down the siding’s edges, which had somewhat curled up over time. Apply the tape around the opening, overlapping the sidings on the sides by a few inches.
3. Cut the Flange From the Replacement Panel
Using a tape measure, estimate the siding you want and jot down those figures. This method is much more straightforward with electric metal shears than manual ones. Trim the perfect size, then try placing it on the cut area to see if it’s even with the surrounding walls.
4. Apply Gutter Sealant to the Back Edges
To fix the siding, use the gutter sealant as glue. You don’t want the substance on your skin, so put on some latex gloves first! Avoiding the nailing strip at the top, apply a bead of sealant along the cut edges. Place the siding in position. Metals expand when heated, so the siding should hang freely from the nails so it can move with the weather.
5. Work Your Way to the Top
Keep pressing the new panel until it sticks firmly. Trim off the nailing strip once you reach the top using the same technique you used to remove the bottom flange. Cut as near the strip’s edge as possible to align it with the base of the current siding.
6. Seal All Edges With Silicone or Gutter Sealant
Cover all the edges with an extra gutter sealant to stop insects from gaining access under the siding.
7. Use Aluminum Repair Epoxy to Fill Small Holes
Once you have inserted the sliding, watch out for small holes since they can act as homes for small insects. Put on your latex gloves and take a tiny piece of aluminum repair epoxy out of the tube. Use your fingertip to press the putty into the opening. Work fast since this material sets up quickly! Remove any excess to level the patch with the siding.
8. Apply Paint
Once the epoxy and sealant have had time to set, sand the surface to remove any flaking paint. Pressure-wash, then let it air dry. Apply a primer with an alcohol or oil base that has been diluted with two cups per gallon of primer. Bring a tiny piece of the new siding to the paint store to color-match if you don’t have any home paint.
Other Useful Tips: Preventing damage to other metal components is of utmost importance for effective aluminum siding repair. Always employ tools to avoid such damage because it’s effortless to dent the aluminum. When cutting the siding, apply masking tape to either side to protect the nearby region. You can also use a hand brake to bend aluminum siding, which is quite helpful when navigating turns.
Should You Replace or Repair a Damaged Aluminum Siding?
There are factors to consider when making this decision, these include
- Damage severity
- Age of the siding
- Cost of repairs.
You can quickly repair minor siding damage, which will also be relatively cheap. Again, aluminum siding can last many years with proper care and maintenance. However, if your siding is old or damaged, it may be time to consider replacing it. Ultimately, the decision comes down to a balance of cost, time, and aesthetics.
How to Replace an Aluminum Siding
Siding comes in wide varieties nowadays. Each of them provides a decent amount of benefits and drawbacks. For instance, wood siding insulates effectively but is also prone to rot and infestation if not adequately sealed. Vinyl siding is yet another example. It’s the most adaptable, least expensive siding material, and the least resilient. You can replace the aluminum siding in these few steps:
- Make a vertical cut with tin snips at every end of the damaged section, then make a horizontal cut through the piece’s middle.
- Take off the lower piece, leaving the upper section with the nails in place.
- Remove the top nailing tab from the new component.
- Liberally coat the upper nailed section with a butyl gutter seal.
- Insert the lower replacement part into the gutter seal and carefully press it in position.
- Use silicone caulking material or butyl gutter seal to caulk the joints.
If you feel that replacing or repairing an aluminum sliding is too hard, you can always contact a nearby siding contractor.
Contact the Professionals- GS Exterior Experts!
While it’s easy to replace damaged siding, many house sidings aren’t precisely “plug-and-play” replacements. You’ll need an experienced contractor to remove the existing siding carefully and install the new one. On that note, contact us. From siding to windows to windows to new deck replacement, allow us to make your home better than you expect. Request a quote today!